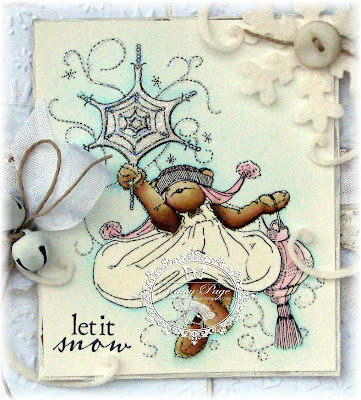
I know some have a hard time with the term Shabby chic!
I am NOT an expert so this is my interpretation of what I think
Shabby Chic is!
By definition it is a form of interior design where furniture and
furnishings are either chosen for their age and signs of wear
and tear or new items are distressed to achieve the appearance of
an antique. At the same time, a soft, minimalistic, and feminine feel is
emphasized to differentiate it from regular vintage decor; hence the
"chic" in the name. Whites and worn or bleaches out pastels are
favorite colours. Usually alot of flowers too!
(But I used snowflakes instead!)
Right now I take that to be LOTS and LOTs of white on white
and cracked paint and loads of fabric and texture! Oh and a
touch of glitter!!!That is how I like to do it!
So the things I use to achieve my look are:
~FLAT or MATTE finish White Spray Paint (Thanks to Minna)
~Picket Fence Distress Crackle Paint
~DecoArt Snow-Tex
~Martha Stewart Coarse Fine Glitter
~loads of cheesecloth, lace, seam binding and felt (All in white!)
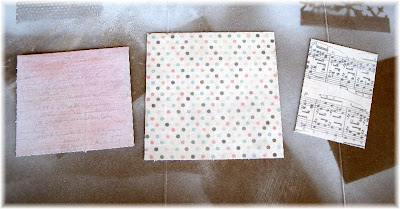
Here is my card after I have picked out the papers that I want to use:
First thing I do is give my papers a light coating of spray paint,
you don't want to overdo it but just until you like the results.
I also like spraying all my fabrics too as it gives them a nice
flat finish and it also stiffens them up alittle so applying the
crackle paint down the road is a little easier.
Next I run the crackle paint down the edges of the papers, I leave a nice
thick brush so that I get alot on my edges. You don't have to
do it any certain way and really the less careful you are the
better it looks! Really!!!
Also the thicker the paint ~ the bigger and better the cracks!!!
You can decide what edges you want the paint to be on. I usually put a healthy
dose on my dp and a light coat on my kraft base card:
Then I also added some to my diecuts. I wanted the kraft one to
be completely covered in white, because it is behind the
lighter one, so I just painted it on and placed it in a clear spot:
When all the crackle paint dries, which here in Texas literally takes minutes,
I add my mix of crackle paint, water and snow-tex. I just
made this mixture to my liking and put it in an old crackle paint
jar because I like the built in brush. Here is what it looks like:
Then again I run it over my papers just like the crackle paint. I
tend to do it in spots as opposed to all over because
I want the crackle paint to show:
While that is a little white I added the glitter where I want it.
I added it to all the individual snowflakes and the large
white layer in the back:
When it all dries put your card together!!! Don't forget to
throw in all your fabrics and what not!!!!
Here is a comparison of "shabby chic" and letting it be:
Here is my finished card with all my other details added:
My true color and texture shot:
Close up of more texture and layering:
Isn't this image just adorable!! I love it and it makes me want
to go and jump in the snow!!!
Image was colored with distress inks and twinkling h20's.
I hope you enjoyed the tutorial! Sorry if it was lengthy but
this is only my 2nd time making one up and I didn't
want to leave anything out!!!!
So if you want to play along with the shabby chic theme
go
here and see the details ~ you can get yourself
a Teddy Bo & Co image!!!
Thanks so much for stopping by
and I hope you have a fabulous day!
:)Kathy


